显示标签为“solderingcopper”的博文。显示所有博文

2024年5月21日星期二

Induction Soldering Copper Tube

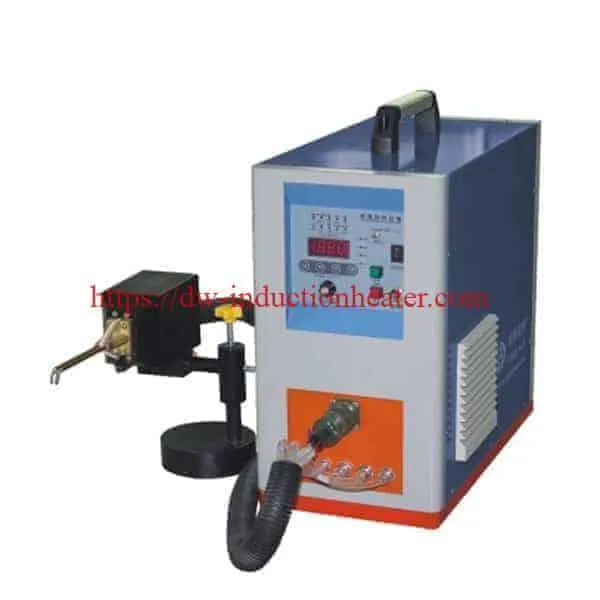
Induction Soldering Copper Tube With High Frequency Heating Units Objective: To heat a section of 3/8" copper tubing along with a 900 elbow for soldering. The copper tubing is to be used in Ice Machine Evaporator Assemblies, and soldering takes place after the tubes have been placed within the assembly. Heating must take place in a channel type coil to provide easy access, once the tubing has been installed. Solder can be manually fed after temperature has been reached. Material: 3/8" Thin Walled Copper Tubing and 900 Elbow Temperature: 6000F Application: Through the use of the DW-UHF-20kW output solid state induction power supply and a unique three (3) turn channel coil, the following results were achieved: 6000F was reached in 10 seconds. A quality solder joint was observed with adequate flow and surface texture. Equipment: DW-UHF-20kW output solid state induction power supply including one (1) remote heat station containing one (1) 1.2 μF capacitor, and a unique three (3) turn channel coil. Frequency: 200 kHz induction soldering copper tube https://dw-inductionheater.com/induction-soldering-copper-tube-pipe.html?feed_id=246441&_unique_id=664c73520bf27
2024年5月18日星期六

Induction Soldering Copper Tap

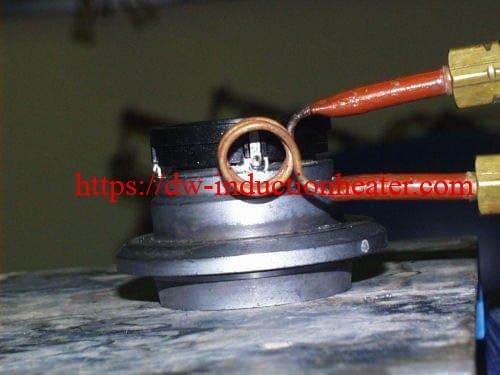
Induction Soldering Copper Tap on a Speaker Ring with IGBT Induction Heater Objective Heat copper tab until the solder reflows. Material Copper tab 0.25 X 0.25 inch square about 0.05 inches thick. Lead free solder material (higher melting temperature than regular solder.) Temperature 500 ºF for 1.25 seconds Frequency 286 kHz Equipment DW-UHF-4.5 kW, 150-400 kHz solid state induction heating system equipped with a remote heat station containing one 1.2 μF capacitor and a specially-designed work coil.. A multi-turn helical coil about 3/16 inch internal diameter made out of 1/16 inch diameter tubing. Process Solder wire is fed onto speaker tab area using an automatic wire feeder. It is then heated to re-flow the solder. Results/Benefits With an efficient coil design induction heating easily reaches the desired reflow temperature in a very short amount of time. induction soldering copper https://dw-inductionheater.com/induction-soldering-copper-tap.html?feed_id=246140&_unique_id=664997f496486

2024年5月14日星期二

Induction Soldering Copper Wires

Induction Soldering Copper Wires With IGBT High Frequency Heating Units Objective Soldering two copper wires to pre-installed turrets on a copper buss bar Material Solder dipped copper/nickel buss bar, 2 tinned stranded copper wires, brazing stick Temperature 446 ºF (230 ºC) Frequency 230 kHz Equipment • DW-UHF-6kW induction heating system, equipped with a remote workhead containing one 1.2μF capacitor. • An induction heating coil designed and developed specifically for this application. Process A four turn split helical coil is used to solder the buss bar assembly. The 2 copper wires are applied to the turrets and power is applied for 30 seconds. The brazing stick is fed by hand to the heated parts and the braze flows evenly, creating the joint. Results/Benefits Induction heating provides: • Reduced solder time • Even distribution of heating • Joint to joint consistency   induction soldering copper wires https://dw-inductionheater.com/induction-soldering-copper-wires.html?feed_id=245596&_unique_id=6643e16e48745

2024年4月1日星期一

Induction Soldering Copper Wire Connectors

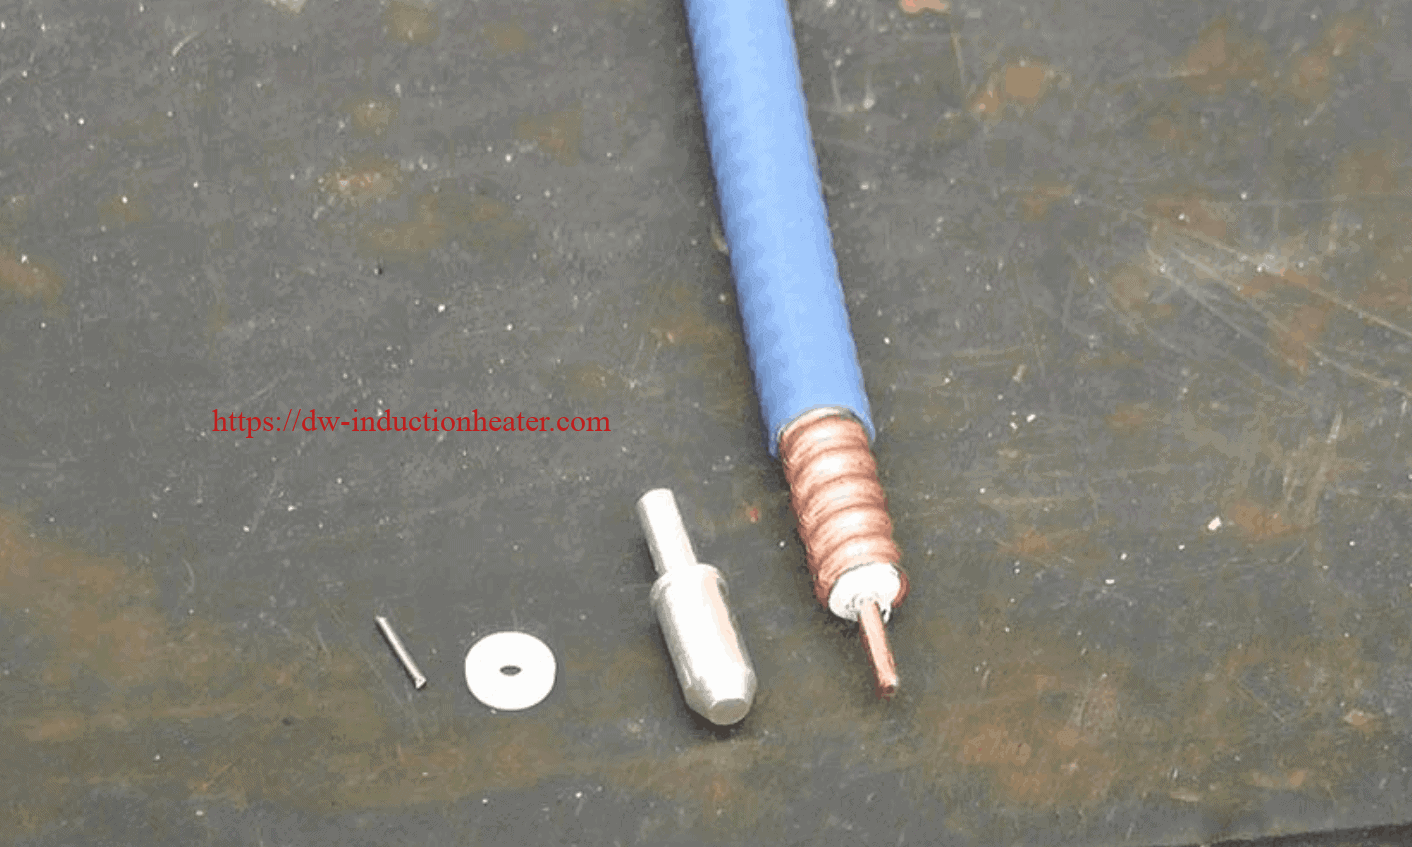
Objective The objective of this application test is to determine heating times for induction soldering copper wire connectors onto a copper coaxial cable. The customer would like to replace hand soldering with soldering irons, with induction soldering. Hand soldering can be labor intensive, and the resulting solder joint is highly dependent on the skill of the operator. Induction soldering allows finite process control, and provides a consistent result.
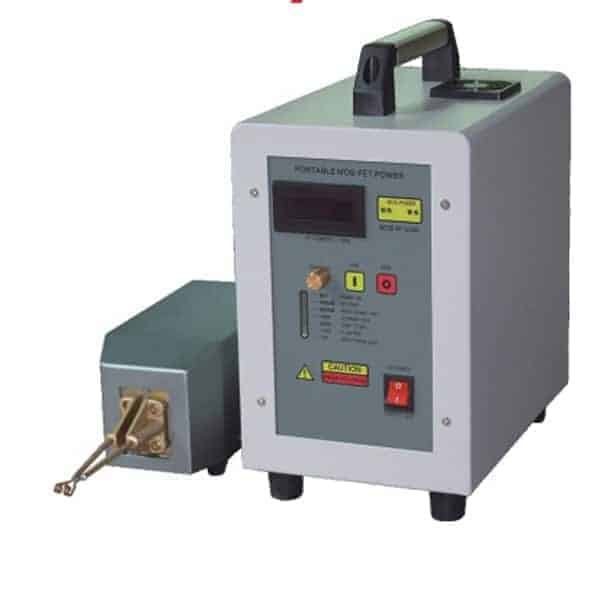
Equipment DW-UHF-6KW-III handheld induction brazing heater handheld inductino heaterMaterials • Copper coaxial cable • Plated copper connectors • Copper bullet-shaped internal connector • Copper pin-shaped internal connector • Solder wire • Carbon steel
Test 1: Soldering Copper Coax Center Conductor to Bullet-Shaped Center Pin Key Parameters Temperature: ~400°F (204°C) Power: 1.32 kW Time: 3 seconds for bullet connector
Test 2: Soldering Copper Coax center conductor to Needle-Shaped Center Pin Key Parameters Temperature: ~400°F (204°C) Power: 1.32 kW Time: 1.5 second for needle connector
Test 3: Soldering Copper Coax to the End Connector (Bullet-Shaped Center Pin) Key Parameters Temperature: ~400°F (204°C) Power: 1.8 kW Time: 30 seconds of heating time, followed by a 10 second cooling cycle
Test 4: Soldering Copper Coax to the End Connector (Needle-Shaped Center Pin) Key Parameters Temperature: ~400°F (204°C) Time: 30 seconds of heating time, followed by a 10 second cooling cycle
Process: For each type of center pin, the soldering process has two steps. First, soldering the center pin (bullet-shaped or needle-shaped) to the center conductor of the coaxial cable; and second, soldering the coaxial cable with the pin into the end connector Tests 1 and 2: Soldering copper coax center conductor to the connector center pin
  1. The internal connector pin (needle and bullet followed the same process) were assembled to the coaxial cable center conductor. A solder slug roughly ½ the length of the pin where the wire is to be soldered, was cut and placed in the receiving end of the center pin. The copper conductor of the coax was positioned to rest on the solder slug in the pin with light pressure downward.
  2. The assembly was placed into a two-turn induction coil, and power was turned on.
  3. As the solder melted, the copper conductor of the coax seated into the center pin. The assembly was held still for several more seconds as the solder cooled. Note: it is important to keep the solder joint still until it has cooled. If movement occurs, a “cold” solder joint can result.
Tests 3 and 4: Soldering copper screw-type end connector to the Center Pin
  1. Solder wire was wound around the corrugated flutes of the coax. The coax with solder was placed into the end connector.
  2. The assembly was placed into a u-shaped induction coil, and power was turned on.
  3. Heat time – 30 seconds for either assembly followed by a 10 second hold to let the alloy solidify.
Results/Benefits: The soldering was successful, and confirmed that induction soldering copper wire connectors is an excellent alternative to hand soldering.
  • Precise control of the time and temperature
  • Power on demand with rapid heat cycles
  • Repeatable process, not operator dependent
  • Safe heating with no open flames
  • Energy efficient heating
https://dw-inductionheater.com/induction-soldering-copper-wire-connectors.html?feed_id=239662&_unique_id=660b7791d841c

Induction Soldering Copper Pipes to PCB Board

Objective: Test –Induction Soldering Copper Pipes to PCB Board Industry: Medical & Dental Materials: Flat copper pipes, PCB board Alloy: Low-temperature solder paste
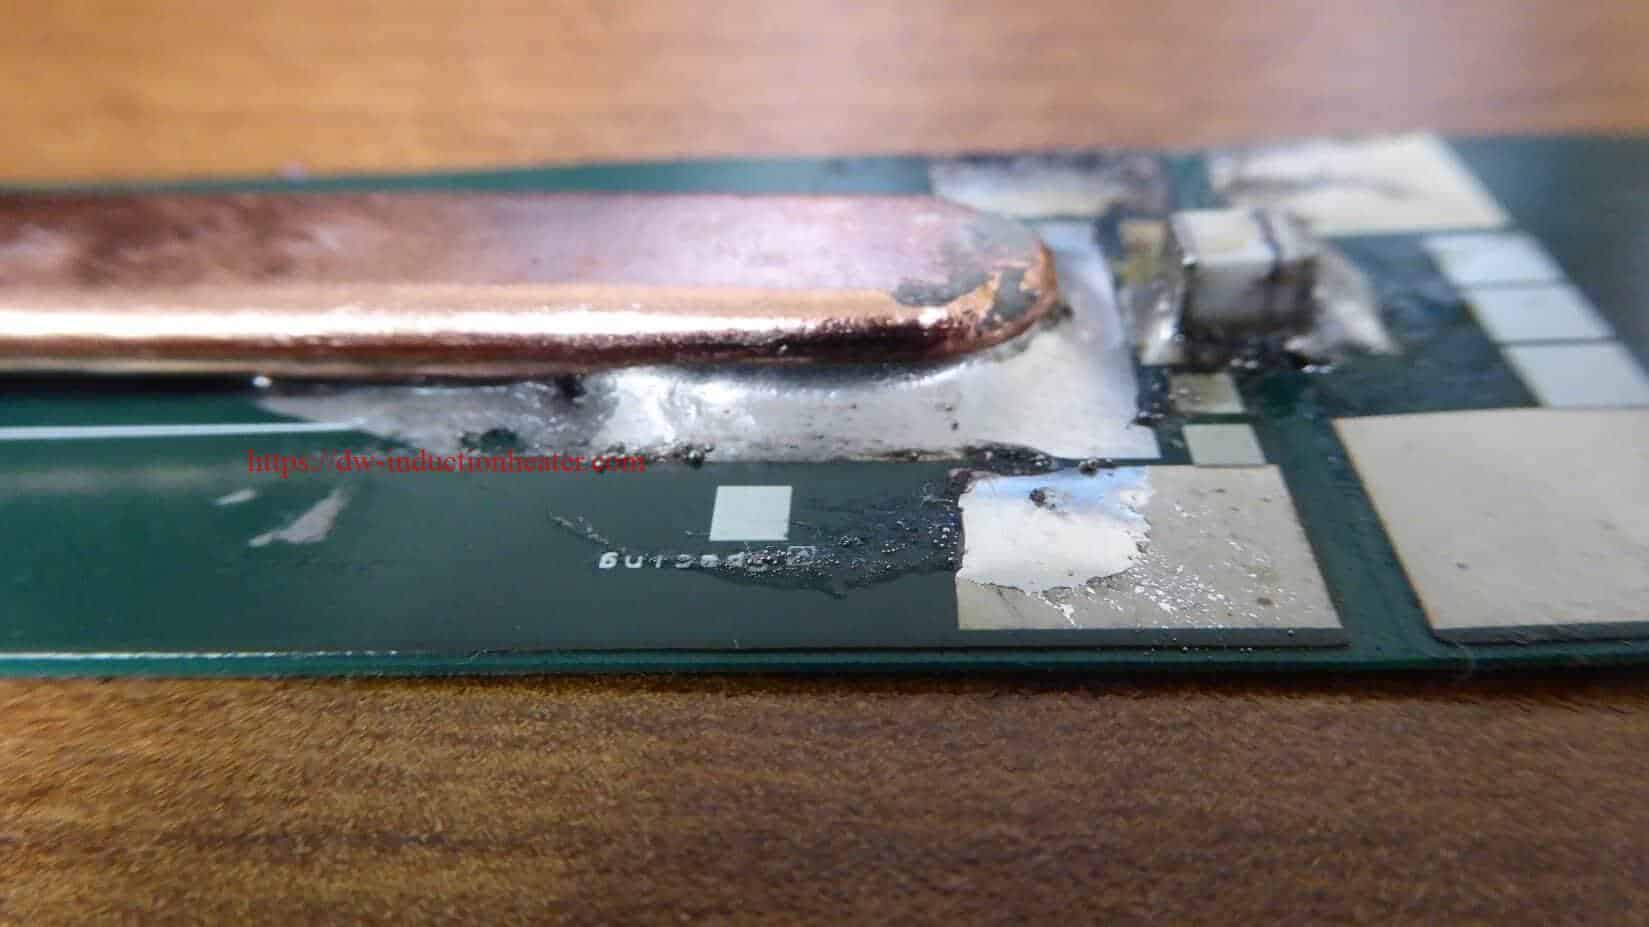
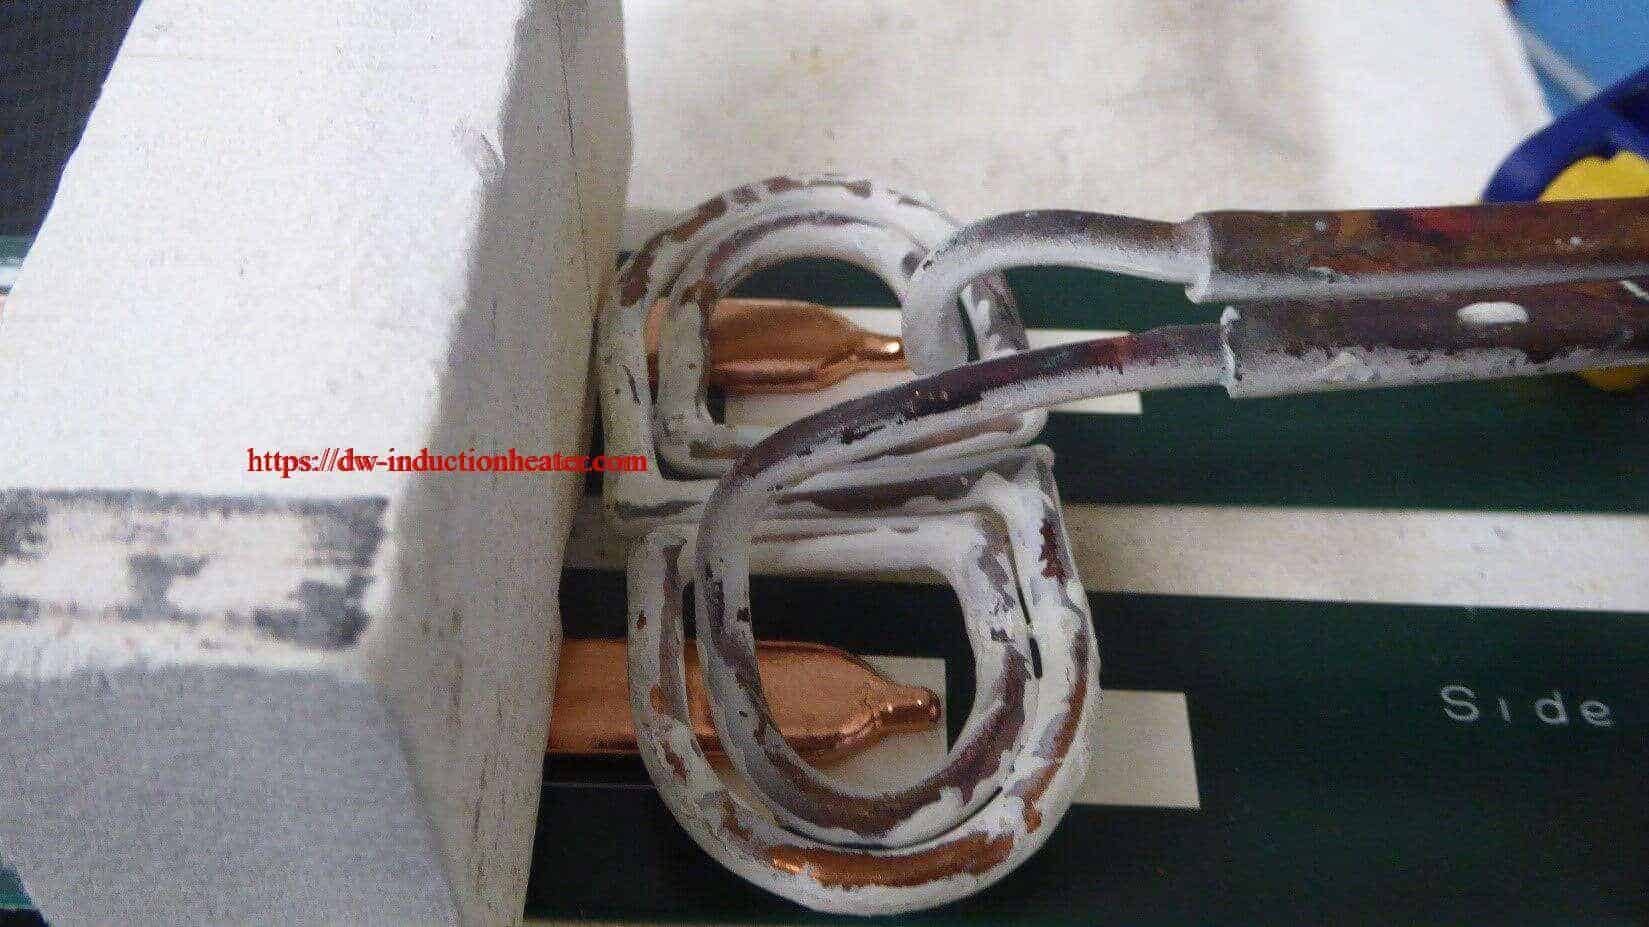
Equipment: DW-UHF-6KW-I Handheld Induction Heater portable induction heating units Power: 1.88 kW Time: 15 secs. Coil: Coated custom-made coil. The Process: HLQ was contacted by a leading manufacturer of clinical diagnostic equipment who is striving to drive innovation in the Magnetic Resonance Imaging (MRI) technology. The flat pipes, featured in this heating application, are used to transfer heat with minimal temperature difference or spread the heat across a surface. Our induction heating solution helped the client to cut manufacturing time which previously took 1 hour to produce 16 soldered copper heat pipes. The DW-UHF-6KW-I handheld induction heating power supply along with a heat station successfully performed the soldering process in approximately 15 seconds. We also used one of our custom-made induction coils with cement coasting to ensure that the coil will not suffer mechanical damage. To perform the test, we positioned the induction soldering copper pipes onto two flat pads containing low-temperature solder paste. Induction heating ensures complete repeatability. There is a significant reduction in cycle time and increased efficiency as now multiple parts can be soldered simultaneously.
https://dw-inductionheater.com/induction-soldering-copper-pipes-to-pcb-board.html?feed_id=239594&_unique_id=660ac11a870da

2023年9月28日星期四

Induction Soldering Copper Tube

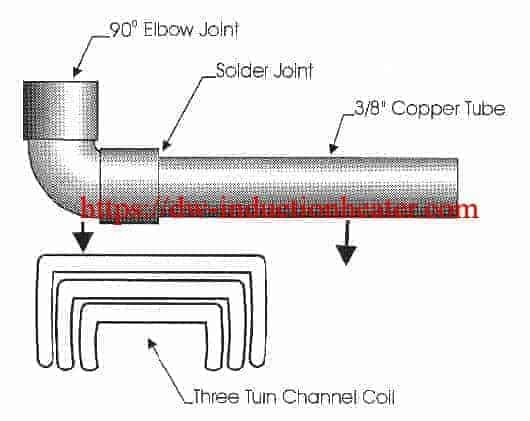
Induction Soldering Copper Tube With High Frequency Heating Units Objective: To heat a section of 3/8" copper tubing along with a 900 elbow for soldering. The copper tubing is to be used in Ice Machine Evaporator Assemblies, and soldering takes place after the tubes have been placed within the assembly. Heating must take place in a channel type coil to provide easy access, once the tubing has been installed. Solder can be manually fed after temperature has been reached. Material: 3/8" Thin Walled Copper Tubing and 900 Elbow Temperature: 6000F Application: Through the use of the DW-UHF-20kW output solid state induction power supply and a unique three (3) turn channel coil, the following results were achieved: 6000F was reached in 10 seconds. A quality solder joint was observed with adequate flow and surface texture. Equipment: DW-UHF-20kW output solid state induction power supply including one (1) remote heat station containing one (1) 1.2 μF capacitor, and a unique three (3) turn channel coil. Frequency: 200 kHz induction soldering copper tube https://dw-inductionheater.com/induction-soldering-copper-tube-pipe.html?feed_id=228071&_unique_id=6515cfb975c26
2023年9月26日星期二

Induction Soldering Copper Tap

Induction Soldering Copper Tap on a Speaker Ring with IGBT Induction Heater Objective Heat copper tab until the solder reflows. Material Copper tab 0.25 X 0.25 inch square about 0.05 inches thick. Lead free solder material (higher melting temperature than regular solder.) Temperature 500 ºF for 1.25 seconds Frequency 286 kHz Equipment DW-UHF-4.5 kW, 150-400 kHz solid state induction heating system equipped with a remote heat station containing one 1.2 μF capacitor and a specially-designed work coil.. A multi-turn helical coil about 3/16 inch internal diameter made out of 1/16 inch diameter tubing. Process Solder wire is fed onto speaker tab area using an automatic wire feeder. It is then heated to re-flow the solder. Results/Benefits With an efficient coil design induction heating easily reaches the desired reflow temperature in a very short amount of time. induction soldering copper https://dw-inductionheater.com/induction-soldering-copper-tap.html?feed_id=227951&_unique_id=6512f46d8ad53

2023年9月22日星期五

Induction Soldering Copper Wires

Induction Soldering Copper Wires With IGBT High Frequency Heating Units Objective Soldering two copper wires to pre-installed turrets on a copper buss bar Material Solder dipped copper/nickel buss bar, 2 tinned stranded copper wires, brazing stick Temperature 446 ºF (230 ºC) Frequency 230 kHz Equipment • DW-UHF-6kW induction heating system, equipped with a remote workhead containing one 1.2μF capacitor. • An induction heating coil designed and developed specifically for this application. Process A four turn split helical coil is used to solder the buss bar assembly. The 2 copper wires are applied to the turrets and power is applied for 30 seconds. The brazing stick is fed by hand to the heated parts and the braze flows evenly, creating the joint. Results/Benefits Induction heating provides: • Reduced solder time • Even distribution of heating • Joint to joint consistency   induction soldering copper wires https://dw-inductionheater.com/induction-soldering-copper-wires.html?feed_id=227711&_unique_id=650d3e0d9fa4b

2023年9月1日星期五

Induction Soldering Copper Tube

Induction Soldering Copper Tube With High Frequency Heating Units Objective: To heat a section of 3/8" copper tubing along with a 900 elbow for soldering. The copper tubing is to be used in Ice Machine Evaporator Assemblies, and soldering takes place after the tubes have been placed within the assembly. Heating must take place in a channel type coil to provide easy access, once the tubing has been installed. Solder can be manually fed after temperature has been reached. Material: 3/8" Thin Walled Copper Tubing and 900 Elbow Temperature: 6000F Application: Through the use of the DW-UHF-20kW output solid state induction power supply and a unique three (3) turn channel coil, the following results were achieved: 6000F was reached in 10 seconds. A quality solder joint was observed with adequate flow and surface texture. Equipment: DW-UHF-20kW output solid state induction power supply including one (1) remote heat station containing one (1) 1.2 μF capacitor, and a unique three (3) turn channel coil. Frequency: 200 kHz induction soldering copper tube

2023年8月14日星期一

Induction Soldering Copper Wire Connectors

Objective The objective of this application test is to determine heating times for induction soldering copper wire connectors onto a copper coaxial cable. The customer would like to replace hand soldering with soldering irons, with induction soldering. Hand soldering can be labor intensive, and the resulting solder joint is highly dependent on the skill of the operator. Induction soldering allows finite process control, and provides a consistent result.
Equipment DW-UHF-6KW-III handheld induction brazing heater handheld inductino heaterMaterials • Copper coaxial cable • Plated copper connectors • Copper bullet-shaped internal connector • Copper pin-shaped internal connector • Solder wire • Carbon steel
Test 1: Soldering Copper Coax Center Conductor to Bullet-Shaped Center Pin Key Parameters Temperature: ~400°F (204°C) Power: 1.32 kW Time: 3 seconds for bullet connector
Test 2: Soldering Copper Coax center conductor to Needle-Shaped Center Pin Key Parameters Temperature: ~400°F (204°C) Power: 1.32 kW Time: 1.5 second for needle connector
Test 3: Soldering Copper Coax to the End Connector (Bullet-Shaped Center Pin) Key Parameters Temperature: ~400°F (204°C) Power: 1.8 kW Time: 30 seconds of heating time, followed by a 10 second cooling cycle
Test 4: Soldering Copper Coax to the End Connector (Needle-Shaped Center Pin) Key Parameters Temperature: ~400°F (204°C) Time: 30 seconds of heating time, followed by a 10 second cooling cycle
Process: For each type of center pin, the soldering process has two steps. First, soldering the center pin (bullet-shaped or needle-shaped) to the center conductor of the coaxial cable; and second, soldering the coaxial cable with the pin into the end connector Tests 1 and 2: Soldering copper coax center conductor to the connector center pin
  1. The internal connector pin (needle and bullet followed the same process) were assembled to the coaxial cable center conductor. A solder slug roughly ½ the length of the pin where the wire is to be soldered, was cut and placed in the receiving end of the center pin. The copper conductor of the coax was positioned to rest on the solder slug in the pin with light pressure downward.
  2. The assembly was placed into a two-turn induction coil, and power was turned on.
  3. As the solder melted, the copper conductor of the coax seated into the center pin. The assembly was held still for several more seconds as the solder cooled. Note: it is important to keep the solder joint still until it has cooled. If movement occurs, a “cold” solder joint can result.
Tests 3 and 4: Soldering copper screw-type end connector to the Center Pin
  1. Solder wire was wound around the corrugated flutes of the coax. The coax with solder was placed into the end connector.
  2. The assembly was placed into a u-shaped induction coil, and power was turned on.
  3. Heat time – 30 seconds for either assembly followed by a 10 second hold to let the alloy solidify.
Results/Benefits: The soldering was successful, and confirmed that induction soldering copper wire connectors is an excellent alternative to hand soldering.
  • Precise control of the time and temperature
  • Power on demand with rapid heat cycles
  • Repeatable process, not operator dependent
  • Safe heating with no open flames
  • Energy efficient heating

2023年8月10日星期四

Induction Soldering Copper Wire Connectors

Objective The objective of this application test is to determine heating times for induction soldering copper wire connectors onto a copper coaxial cable. The customer would like to replace hand soldering with soldering irons, with induction soldering. Hand soldering can be labor intensive, and the resulting solder joint is highly dependent on the skill of the operator. Induction soldering allows finite process control, and provides a consistent result.
Equipment DW-UHF-6KW-III handheld induction brazing heater handheld inductino heaterMaterials • Copper coaxial cable • Plated copper connectors • Copper bullet-shaped internal connector • Copper pin-shaped internal connector • Solder wire • Carbon steel
Test 1: Soldering Copper Coax Center Conductor to Bullet-Shaped Center Pin Key Parameters Temperature: ~400°F (204°C) Power: 1.32 kW Time: 3 seconds for bullet connector
Test 2: Soldering Copper Coax center conductor to Needle-Shaped Center Pin Key Parameters Temperature: ~400°F (204°C) Power: 1.32 kW Time: 1.5 second for needle connector
Test 3: Soldering Copper Coax to the End Connector (Bullet-Shaped Center Pin) Key Parameters Temperature: ~400°F (204°C) Power: 1.8 kW Time: 30 seconds of heating time, followed by a 10 second cooling cycle
Test 4: Soldering Copper Coax to the End Connector (Needle-Shaped Center Pin) Key Parameters Temperature: ~400°F (204°C) Time: 30 seconds of heating time, followed by a 10 second cooling cycle
Process: For each type of center pin, the soldering process has two steps. First, soldering the center pin (bullet-shaped or needle-shaped) to the center conductor of the coaxial cable; and second, soldering the coaxial cable with the pin into the end connector Tests 1 and 2: Soldering copper coax center conductor to the connector center pin
  1. The internal connector pin (needle and bullet followed the same process) were assembled to the coaxial cable center conductor. A solder slug roughly ½ the length of the pin where the wire is to be soldered, was cut and placed in the receiving end of the center pin. The copper conductor of the coax was positioned to rest on the solder slug in the pin with light pressure downward.
  2. The assembly was placed into a two-turn induction coil, and power was turned on.
  3. As the solder melted, the copper conductor of the coax seated into the center pin. The assembly was held still for several more seconds as the solder cooled. Note: it is important to keep the solder joint still until it has cooled. If movement occurs, a “cold” solder joint can result.
Tests 3 and 4: Soldering copper screw-type end connector to the Center Pin
  1. Solder wire was wound around the corrugated flutes of the coax. The coax with solder was placed into the end connector.
  2. The assembly was placed into a u-shaped induction coil, and power was turned on.
  3. Heat time – 30 seconds for either assembly followed by a 10 second hold to let the alloy solidify.
Results/Benefits: The soldering was successful, and confirmed that induction soldering copper wire connectors is an excellent alternative to hand soldering.
  • Precise control of the time and temperature
  • Power on demand with rapid heat cycles
  • Repeatable process, not operator dependent
  • Safe heating with no open flames
  • Energy efficient heating
https://dw-inductionheater.com/induction-soldering-copper-wire-connectors.html?feed_id=222586&_unique_id=64d4cc3b4ff87

2023年8月9日星期三

Induction Soldering Copper Pipes to PCB Board

Objective: Test –Induction Soldering Copper Pipes to PCB Board Industry: Medical & Dental Materials: Flat copper pipes, PCB board Alloy: Low-temperature solder paste
Equipment: DW-UHF-6KW-I Handheld Induction Heater portable induction heating units Power: 1.88 kW Time: 15 secs. Coil: Coated custom-made coil. The Process: HLQ was contacted by a leading manufacturer of clinical diagnostic equipment who is striving to drive innovation in the Magnetic Resonance Imaging (MRI) technology. The flat pipes, featured in this heating application, are used to transfer heat with minimal temperature difference or spread the heat across a surface. Our induction heating solution helped the client to cut manufacturing time which previously took 1 hour to produce 16 soldered copper heat pipes. The DW-UHF-6KW-I handheld induction heating power supply along with a heat station successfully performed the soldering process in approximately 15 seconds. We also used one of our custom-made induction coils with cement coasting to ensure that the coil will not suffer mechanical damage. To perform the test, we positioned the induction soldering copper pipes onto two flat pads containing low-temperature solder paste. Induction heating ensures complete repeatability. There is a significant reduction in cycle time and increased efficiency as now multiple parts can be soldered simultaneously.
https://dw-inductionheater.com/induction-soldering-copper-pipes-to-pcb-board.html?feed_id=222511&_unique_id=64d4155be6b93

2023年7月11日星期二

Induction Soldering Copper Tap

Induction Soldering Copper Tap on a Speaker Ring with IGBT Induction Heater Objective Heat copper tab until the solder reflows. Material Copper tab 0.25 X 0.25 inch square about 0.05 inches thick. Lead free solder material (higher melting temperature than regular solder.) Temperature 500 ºF for 1.25 seconds Frequency 286 kHz Equipment DW-UHF-4.5 kW, 150-400 kHz solid state induction heating system equipped with a remote heat station containing one 1.2 μF capacitor and a specially-designed work coil.. A multi-turn helical coil about 3/16 inch internal diameter made out of 1/16 inch diameter tubing. Process Solder wire is fed onto speaker tab area using an automatic wire feeder. It is then heated to re-flow the solder. Results/Benefits With an efficient coil design induction heating easily reaches the desired reflow temperature in a very short amount of time. induction soldering copper

2023年7月2日星期日

Induction Soldering Copper Wires

Induction Soldering Copper Wires With IGBT High Frequency Heating Units Objective Soldering two copper wires to pre-installed turrets on a copper buss bar Material Solder dipped copper/nickel buss bar, 2 tinned stranded copper wires, brazing stick Temperature 446 ºF (230 ºC) Frequency 230 kHz Equipment • DW-UHF-6kW induction heating system, equipped with a remote workhead containing one 1.2μF capacitor. • An induction heating coil designed and developed specifically for this application. Process A four turn split helical coil is used to solder the buss bar assembly. The 2 copper wires are applied to the turrets and power is applied for 30 seconds. The brazing stick is fed by hand to the heated parts and the braze flows evenly, creating the joint. Results/Benefits Induction heating provides: • Reduced solder time • Even distribution of heating • Joint to joint consistency   induction soldering copper wires
2023年5月29日星期一

Induction Soldering Copper Tap

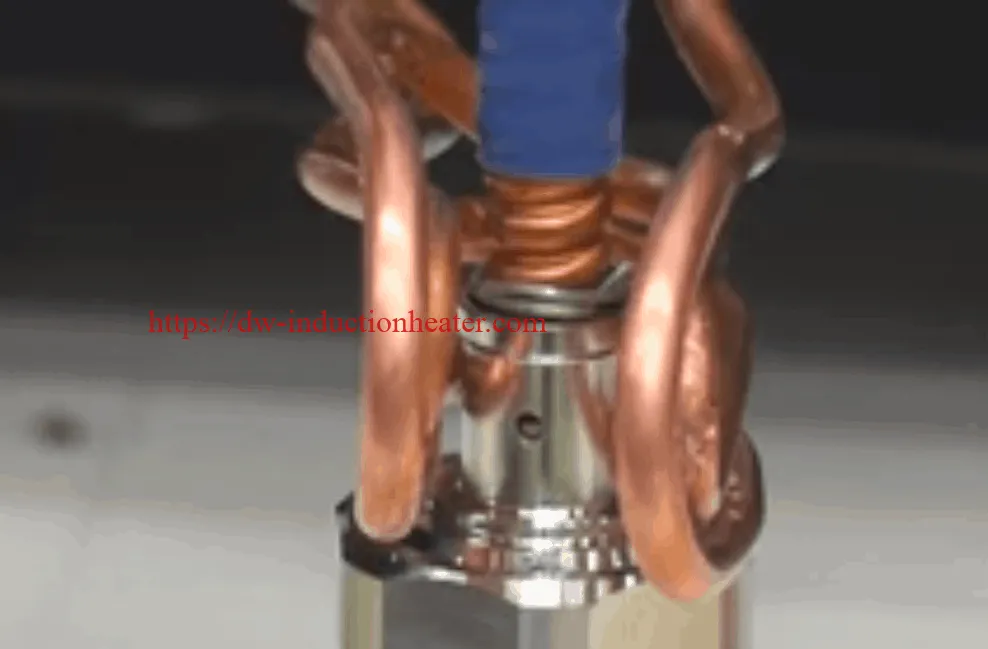
Induction Soldering Copper Tap on a Speaker Ring with IGBT Induction Heater Objective Heat copper tab until the solder reflows. Material Copper tab 0.25 X 0.25 inch square about 0.05 inches thick. Lead free solder material (higher melting temperature than regular solder.) Temperature 500 ºF for 1.25 seconds Frequency 286 kHz Equipment DW-UHF-4.5 kW, 150-400 kHz solid state induction heating system equipped with a remote heat station containing one 1.2 μF capacitor and a specially-designed work coil.. A multi-turn helical coil about 3/16 inch internal diameter made out of 1/16 inch diameter tubing. Process Solder wire is fed onto speaker tab area using an automatic wire feeder. It is then heated to re-flow the solder. Results/Benefits With an efficient coil design induction heating easily reaches the desired reflow temperature in a very short amount of time. induction soldering copper

2023年5月25日星期四

Induction Soldering Copper Wire Connectors

Objective The objective of this application test is to determine heating times for induction soldering copper wire connectors onto a copper coaxial cable. The customer would like to replace hand soldering with soldering irons, with induction soldering. Hand soldering can be labor intensive, and the resulting solder joint is highly dependent on the skill of the operator. Induction soldering allows finite process control, and provides a consistent result.
Equipment DW-UHF-6KW-III handheld induction brazing heater handheld inductino heaterMaterials • Copper coaxial cable • Plated copper connectors • Copper bullet-shaped internal connector • Copper pin-shaped internal connector • Solder wire • Carbon steel
Test 1: Soldering Copper Coax Center Conductor to Bullet-Shaped Center Pin Key Parameters Temperature: ~400°F (204°C) Power: 1.32 kW Time: 3 seconds for bullet connector
Test 2: Soldering Copper Coax center conductor to Needle-Shaped Center Pin Key Parameters Temperature: ~400°F (204°C) Power: 1.32 kW Time: 1.5 second for needle connector
Test 3: Soldering Copper Coax to the End Connector (Bullet-Shaped Center Pin) Key Parameters Temperature: ~400°F (204°C) Power: 1.8 kW Time: 30 seconds of heating time, followed by a 10 second cooling cycle
Test 4: Soldering Copper Coax to the End Connector (Needle-Shaped Center Pin) Key Parameters Temperature: ~400°F (204°C) Time: 30 seconds of heating time, followed by a 10 second cooling cycle
Process: For each type of center pin, the soldering process has two steps. First, soldering the center pin (bullet-shaped or needle-shaped) to the center conductor of the coaxial cable; and second, soldering the coaxial cable with the pin into the end connector Tests 1 and 2: Soldering copper coax center conductor to the connector center pin
  1. The internal connector pin (needle and bullet followed the same process) were assembled to the coaxial cable center conductor. A solder slug roughly ½ the length of the pin where the wire is to be soldered, was cut and placed in the receiving end of the center pin. The copper conductor of the coax was positioned to rest on the solder slug in the pin with light pressure downward.
  2. The assembly was placed into a two-turn induction coil, and power was turned on.
  3. As the solder melted, the copper conductor of the coax seated into the center pin. The assembly was held still for several more seconds as the solder cooled. Note: it is important to keep the solder joint still until it has cooled. If movement occurs, a “cold” solder joint can result.
Tests 3 and 4: Soldering copper screw-type end connector to the Center Pin
  1. Solder wire was wound around the corrugated flutes of the coax. The coax with solder was placed into the end connector.
  2. The assembly was placed into a u-shaped induction coil, and power was turned on.
  3. Heat time – 30 seconds for either assembly followed by a 10 second hold to let the alloy solidify.
Results/Benefits: The soldering was successful, and confirmed that induction soldering copper wire connectors is an excellent alternative to hand soldering.
  • Precise control of the time and temperature
  • Power on demand with rapid heat cycles
  • Repeatable process, not operator dependent
  • Safe heating with no open flames
  • Energy efficient heating

关注者

我的简介

我的照片
HLQ induction heating machine manufacturer provides the service of induction brazing,melting,hot forming,hardening surface,annealing,shrink fitting,PWHT,etc.